Believe it or not – designing a brewery layout is a fine art that takes real skill and experience.
It’s a delicate dance, between fitting as much as you possibly can into the space, while optimising for a smooth brewing process.
Getting the brewery layout right at the beginning of the project is the key to success.
So how can you ensure it is perfect?
Good news – you don’t have to! That’s our job.
Getting started on your brewery layout
In these early stages of planning your brewery, we will ask you three very important questions.
The answers will guide us on our recommendations for a brewing system that meets your needs.
The size of your location – how much space do we have to play with?
Your monthly and annual production – what are your goals?
Your budget – how much do we have to work with?
We will then calculate all the important things like the recommended brewhouse and cellar vessel sizing, cost of equipment and floor space.
Working the brewery equipment into the space
With all this information under our belts, we are moving into the serious part – a giant game of Tetris.
Who doesn’t love a good Tetris session?
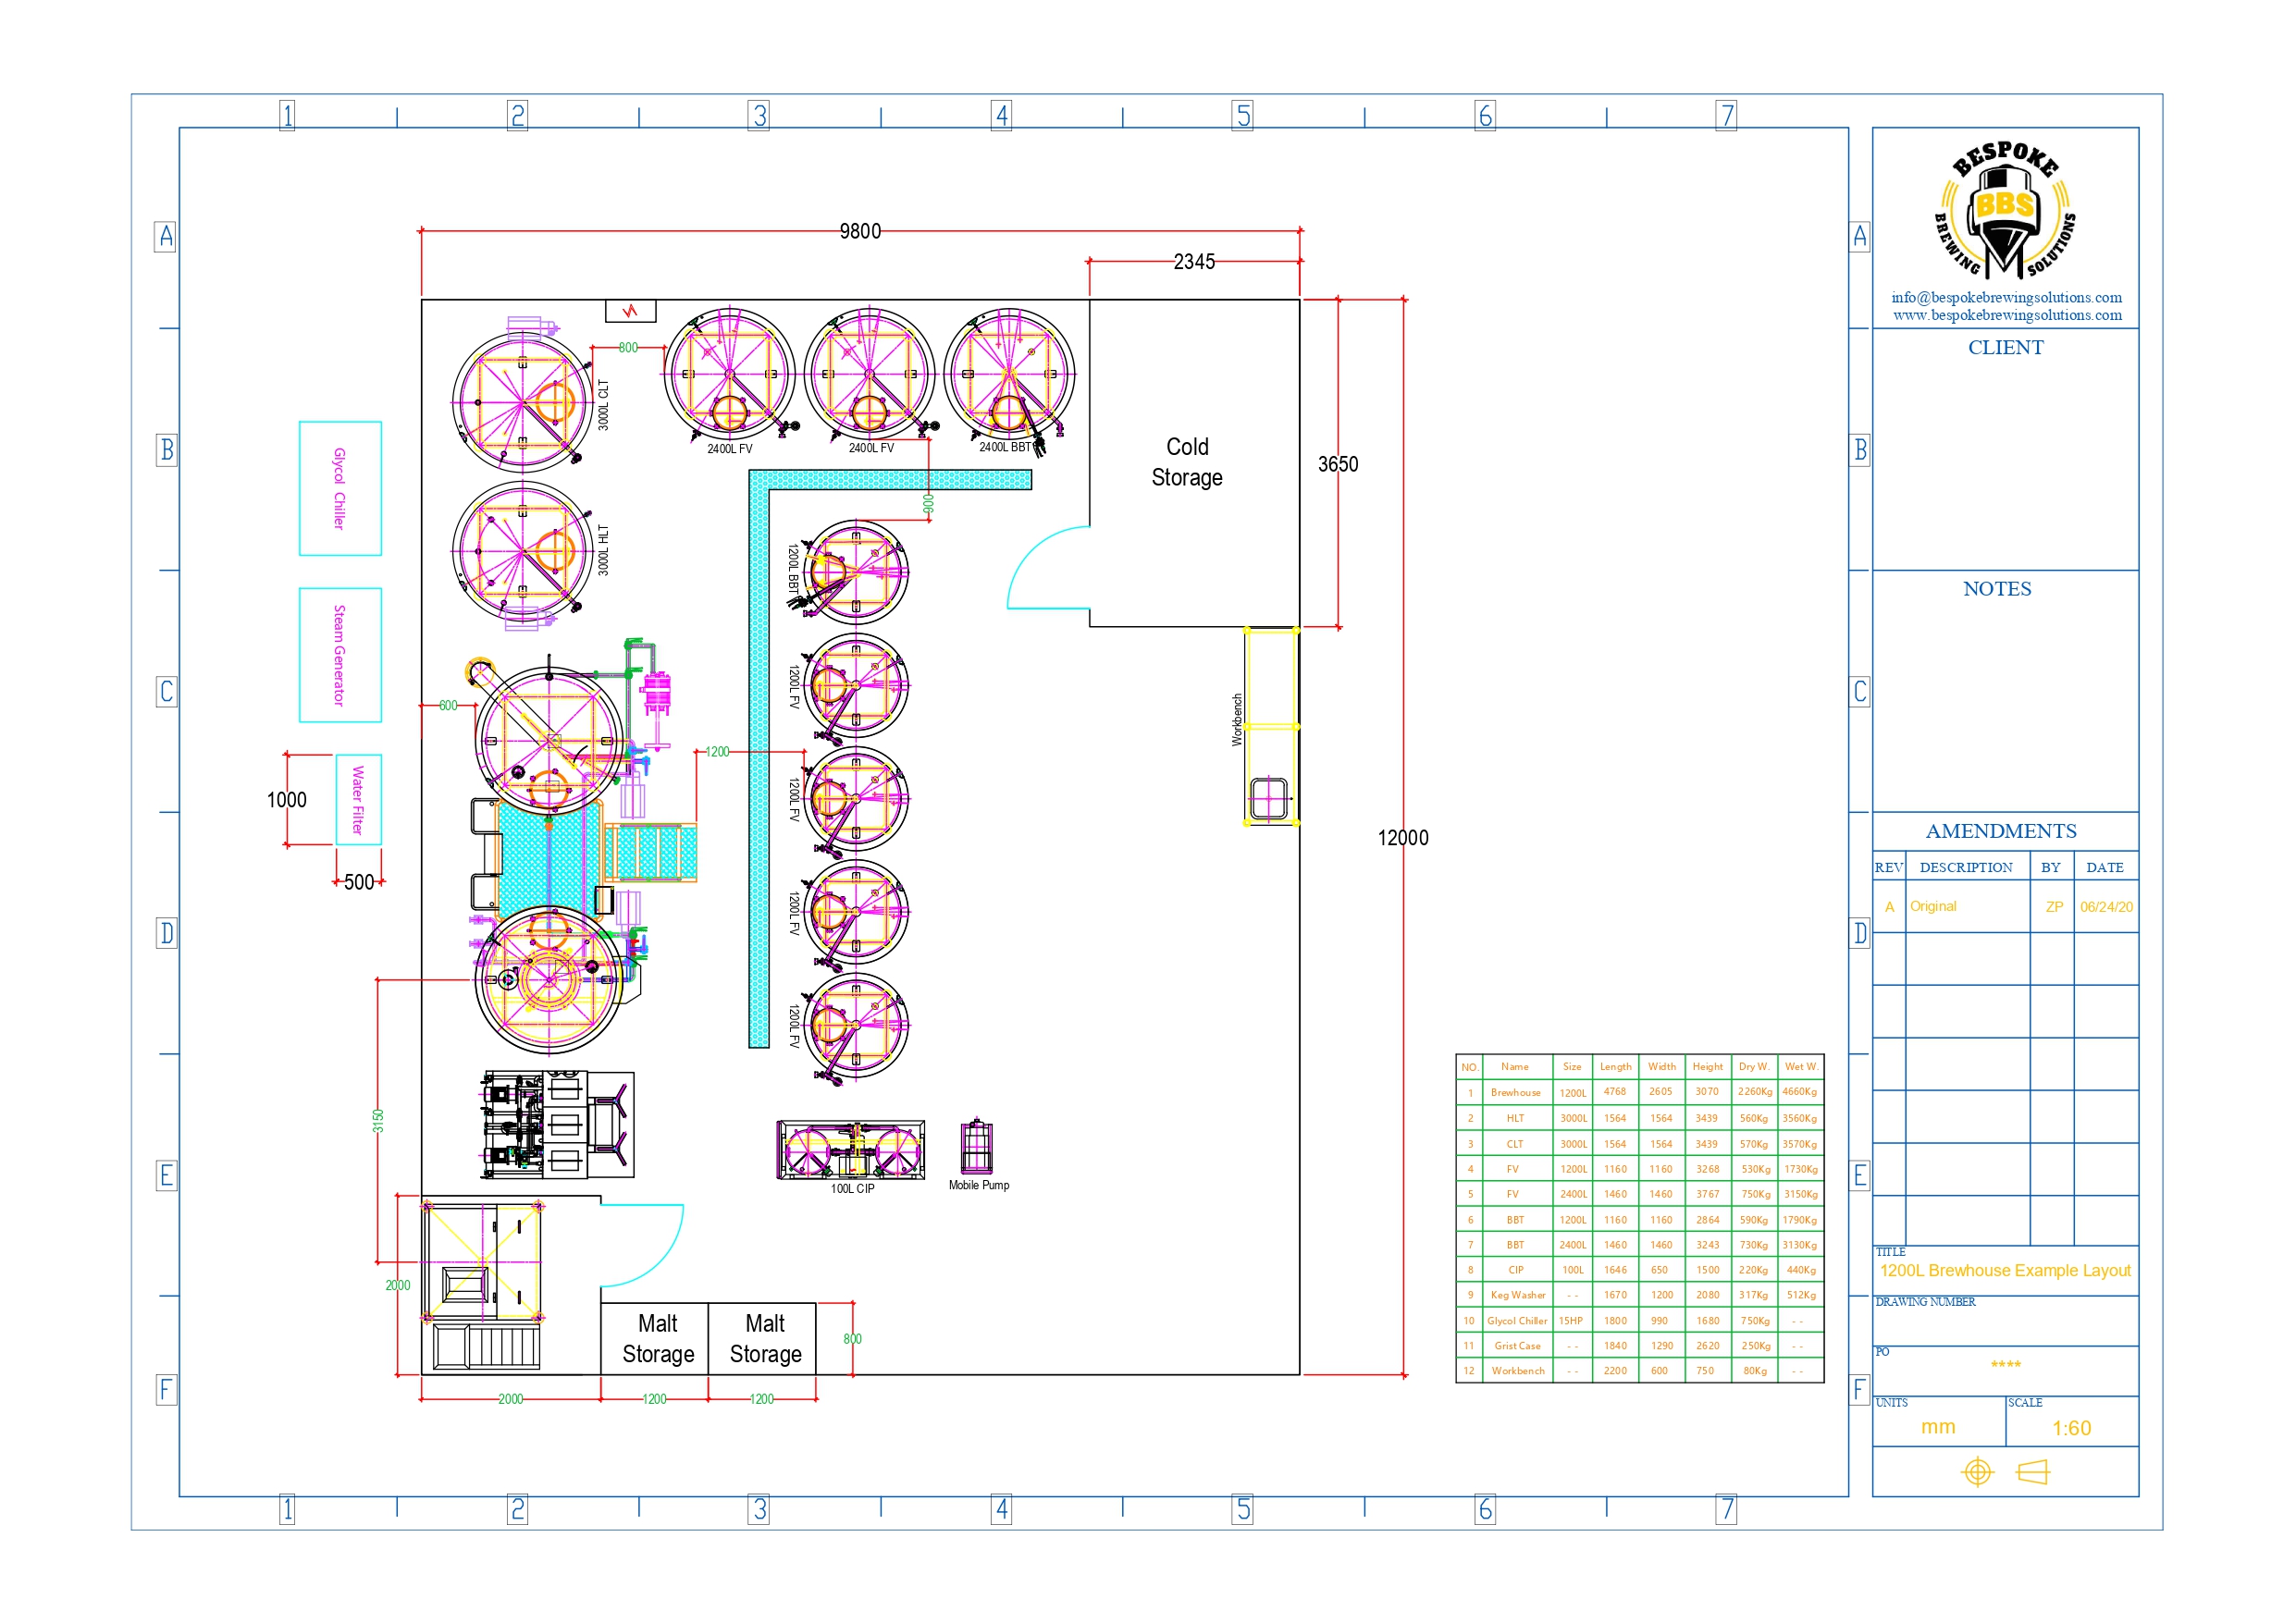
Our first goal is to get a 2D CAD drawing of the space from either the designer/architect or landlord. This drawing is critical – if we are working off an inaccurate drawing, it can lead to huge and costly complications.
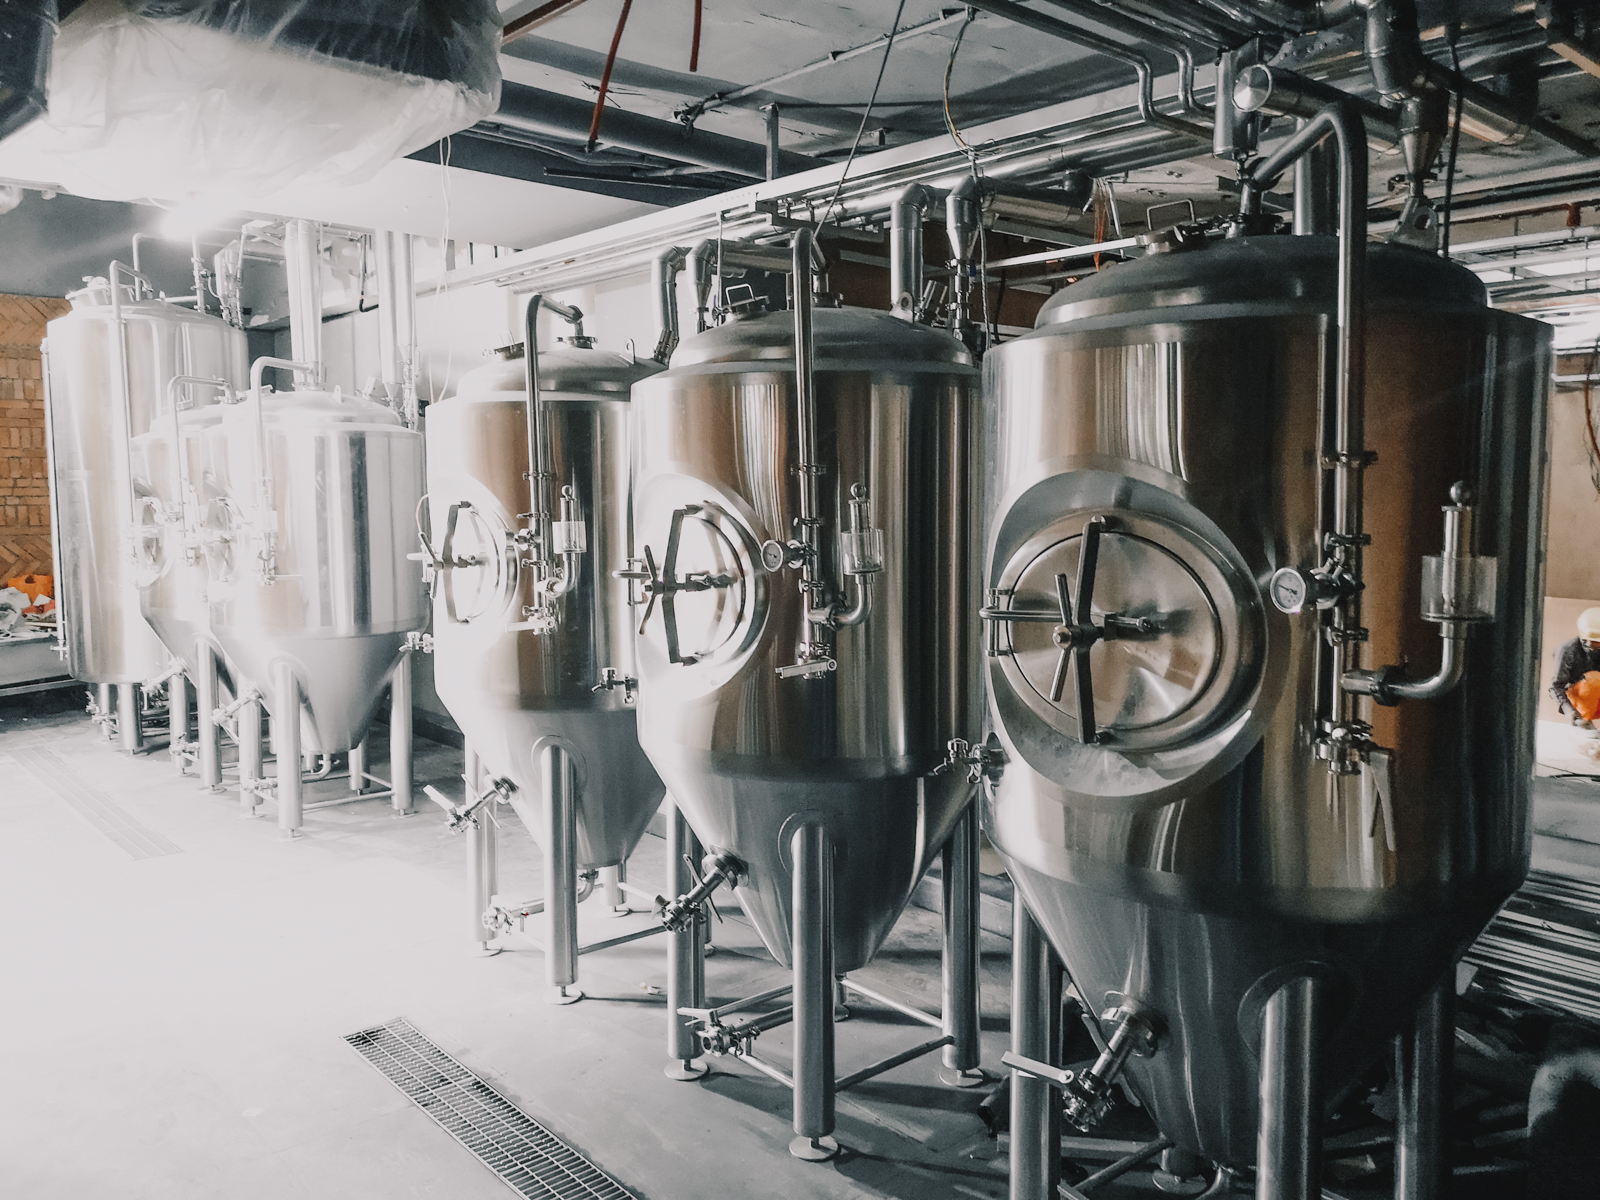
During this phase we want to identify the dimensions of each piece of equipment as well as both their dry and wet weights.
We encourage this information to be shared with all the stakeholders involved in your project, especially the designer/architect and general contractor. This is the first major gate check to ensure the space will fit the planned equipment and handle the load – as the weight adds up quickly! This includes all auxiliary equipment such as steam boilers, glycol chillers, water filters, packaging equipment, etc.
Why Accuracy is Important
Underestimating weight can lead to foundation cracking. We also need to factor in trench drainage, which can take away the structural integrity of the slab if there’s too much weight and decrease height clearances if the need to add to the slab.
The dimensions of the equipment and the location need to be spot on. We’re not saying this to be pedantic! We are saying this because if they are off, by even one millimeter, we could have a serious problem on our hands.
If it gets to unloading day and a piece of equipment doesn’t fit into the space – the entire design is thrown off, and can lead to a domino effect of issues!
Get the pencils out!
Once we’ve worked out what equipment we need and how much we can fit into the space, we start drawing.
We create a series of diagrams that directly represent your brewery layout – exactly as it will appear in real life. As the project progresses, we will live and die by these drawings.
When we design your brewery layout, we have some important things in mind:
The process path – we design a layout which flows with the brewing process, to avoid redundant tasks and movements. Movements take time – and time is money!
Utilities – in our brewery layout design, we take things like piping routing and power outlets into consideration.
Room for expansion – by planning for additional space ahead of time, you will save costs of having to redesign the equipment layout down the track. You can also plan on utility routing and include the initial build out.
General logic – think we’re stating the obvious? You’d be surprised at some of the blunders we have seen over the years! We ask the important questions, like what would be the best location for the glycol inlets and outlets for a FV or BBT? We ensure there is space to get your pallet through, your brite tank is near the cold room and the lauder tun is close to the door so you can easily bring malt out and kegs in. Sometimes it’s the simple things that have a lasting effect.